
The hardware and bandwidth for this mirror is donated by dogado GmbH, the Webhosting and Full Service-Cloud Provider. Check out our Wordpress Tutorial.
If you wish to report a bug, or if you are interested in having us mirror your free-software or open-source project, please feel free to contact us at mirror[@]dogado.de.
The goal of Rnightly is to implement a Dark/Light toggle
mode in your Shiny user interface. You can also change the default
behavior by specifying other colors.

You can install the development version of Rnightly from
Github with :
# install.packages("remotes")

remotes::install_github("feddelegrand7/Rnightly")
The Rnightly has two functions:
use_nightly(): set this function anywhere within
your ui. It activates the nightly
JavaScript library. The function must be run only once.
nightly(): activates the dark/light toggle mode.
Look below for examples on how to use it.
Let’s create a basic shiny app that demonstrates the features of
Rnightly. Here the trigElement will determine
which shiny element will trigger the Dark/Light mode. Note that it’s the
only mandotry argument:
library(shiny)
library(Rnightly)


ui <- fluidPage(

  use_nightly(), # Activating nightlyjs

  h3("Click on the button below to toggle between a Dark/Light mode"),

  actionButton(inputId = "btn", label = "Button"),

  nightly(trigElement = "btn") # Make sure to provide the same id

)


server <- function(input, output){}


shinyApp(ui, server)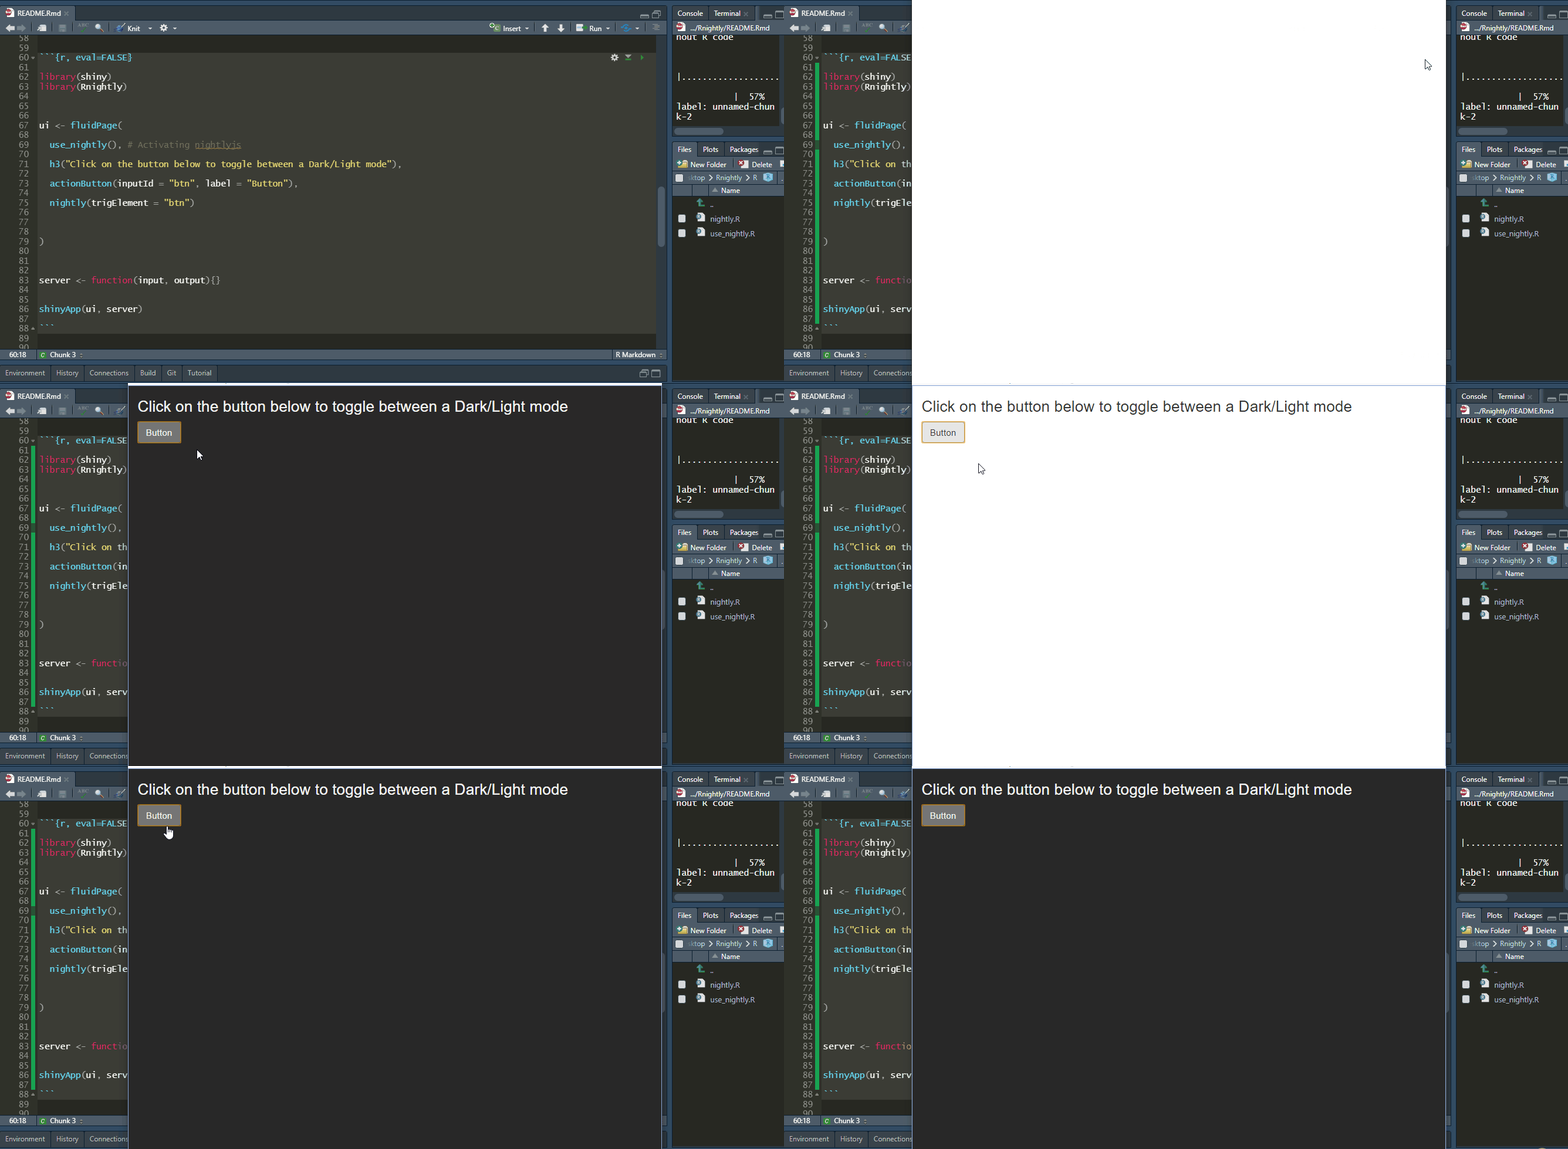
You can specify any Shiny element to toggle your Dark/Light mode, maybe a plot ?
library(shiny)
library(Rnightly)


ui <- fluidPage(

  use_nightly(), # Activating nightlyjs

  h3("Click on the Plot to toggle between a Dark/Light mode"),

  plotOutput(outputId = "plt"),

  nightly(trigElement = "plt")

)


server <- function(input, output){


output$plt <- renderPlot({


  plot(mtcars)

})


}


shinyApp(ui, server)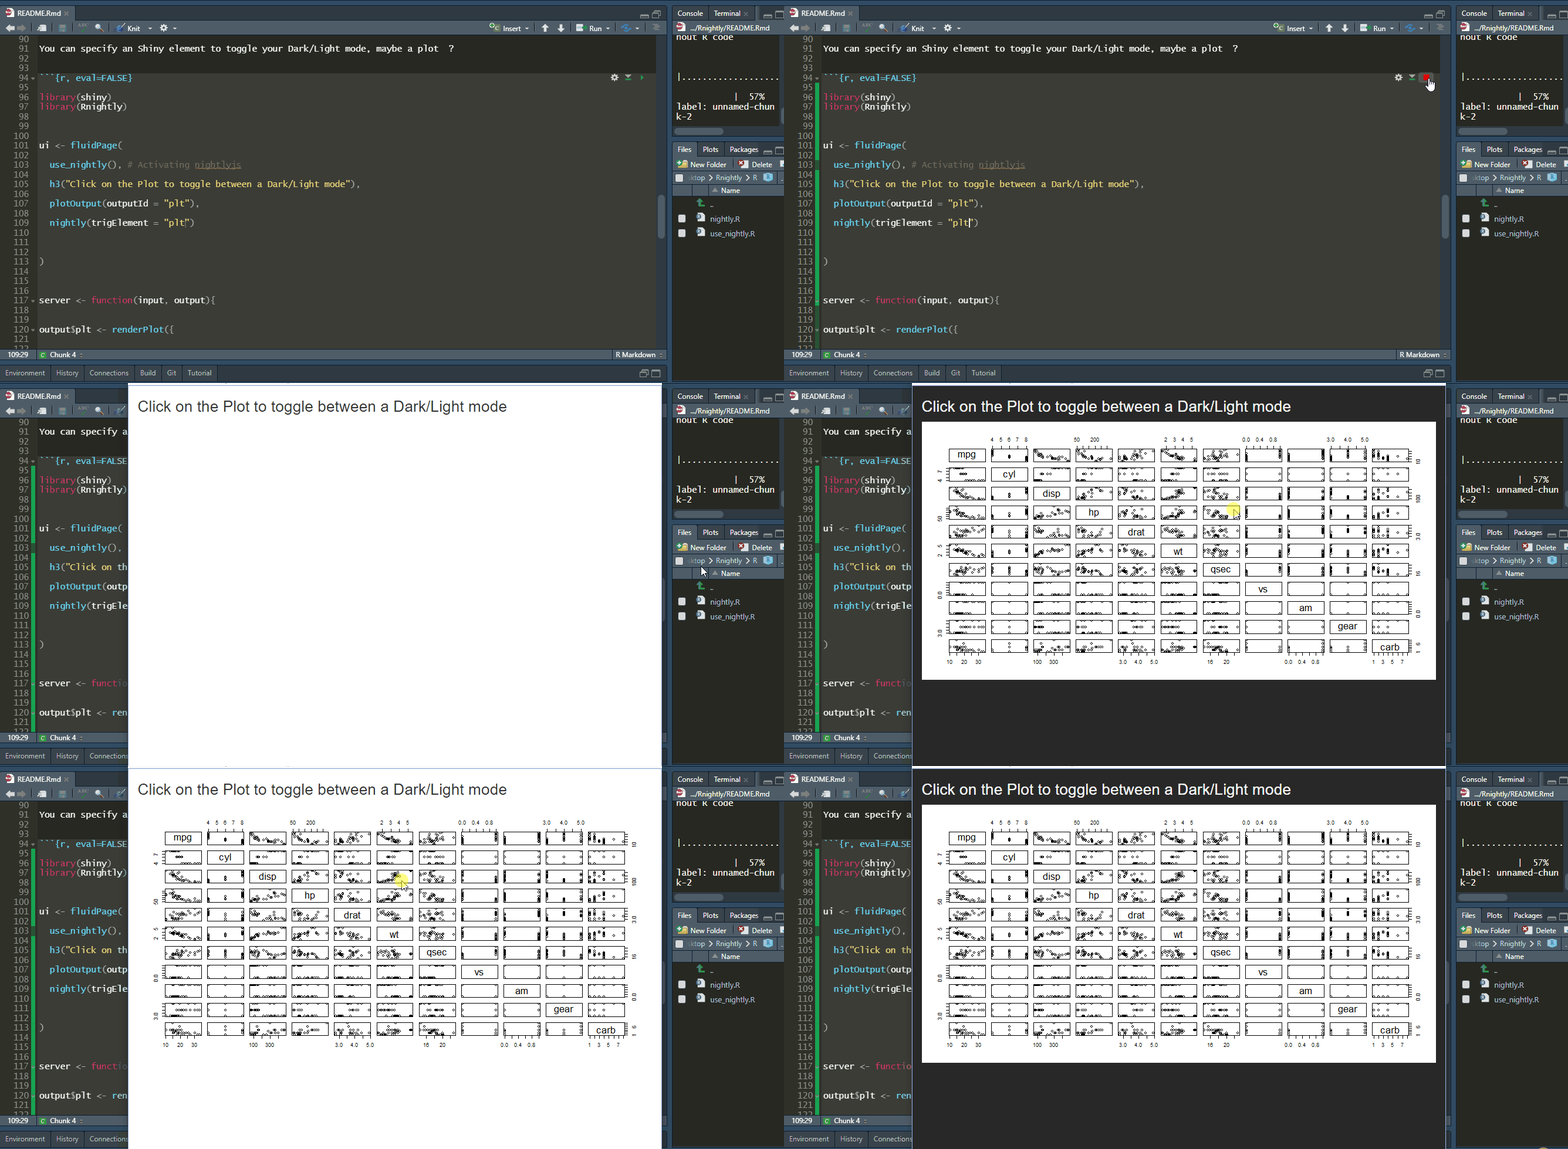
Now the cool part. Instead of Dark, using the bodyColor
argument you can change the color that will be displayed when
toggling:
library(shiny)
library(Rnightly)


ui <- fluidPage(

  use_nightly(),

  h3("Click on the button below to toggle between a Purple/Light mode"),

  actionButton(inputId = "btn", label = "Button"),

  nightly(trigElement = "btn", bodyColor = "#6d6875")

)


server <- function(input, output){}


shinyApp(ui, server)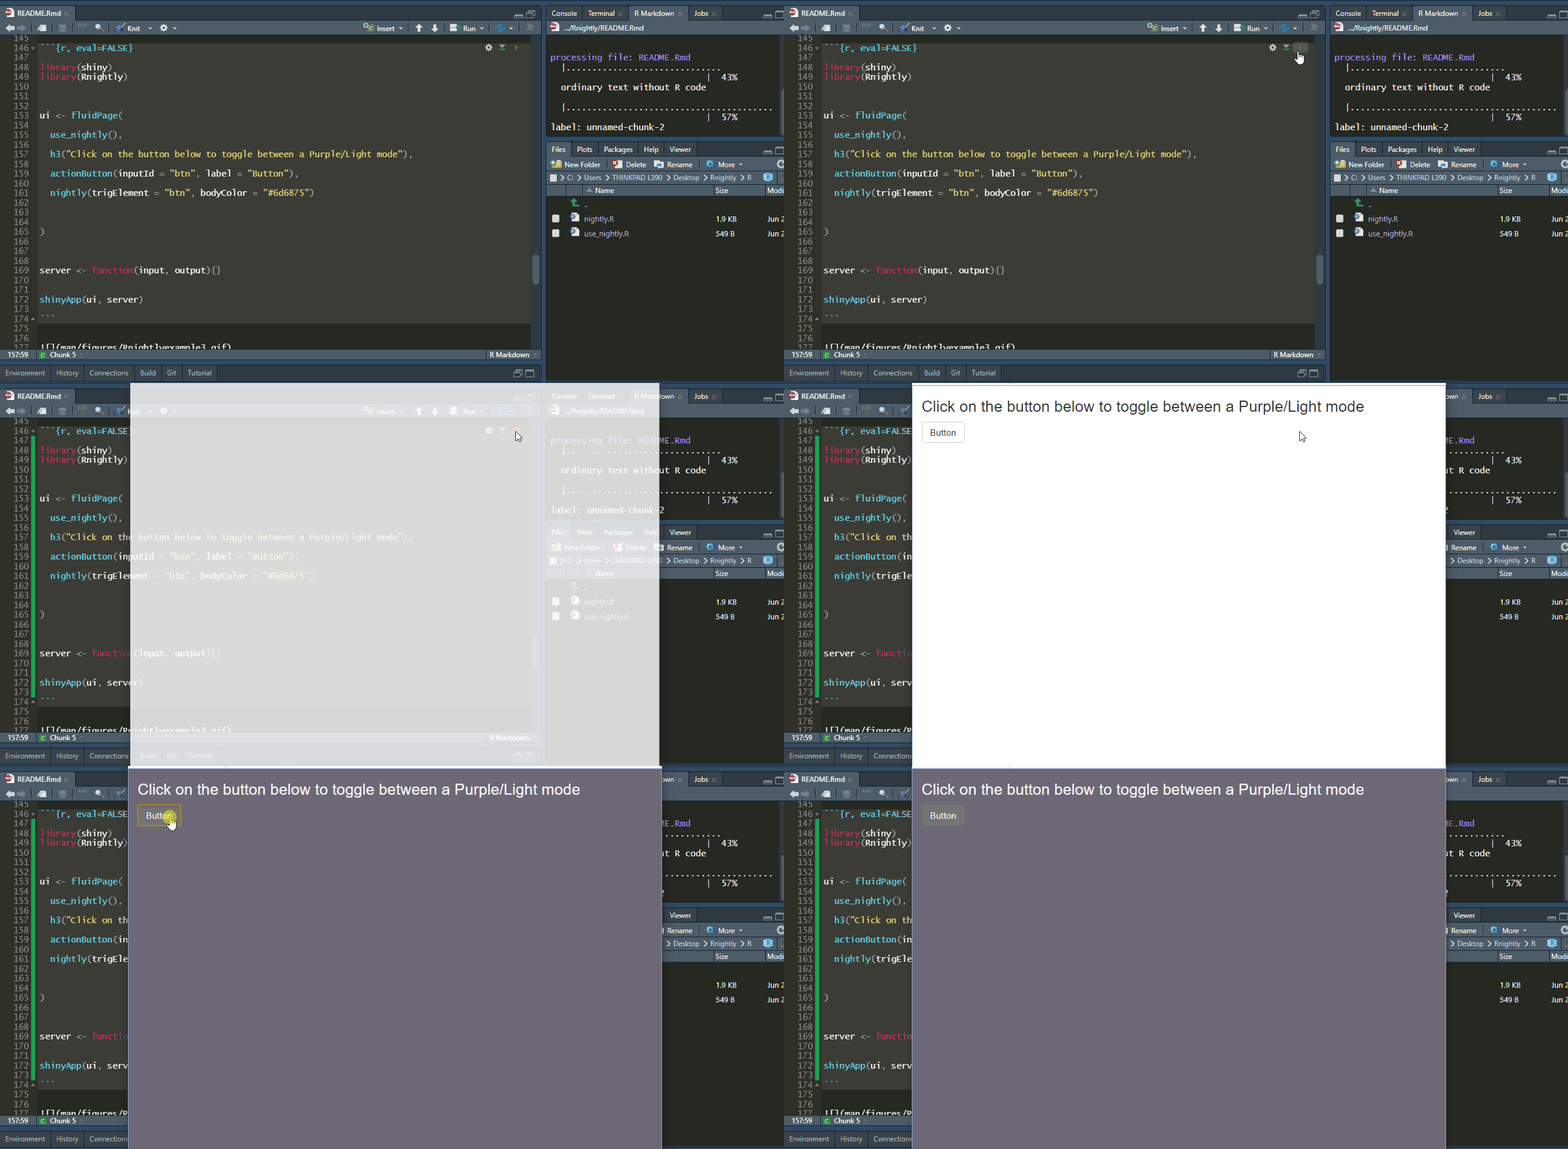
You can also change the text color when toggling :
library(shiny)
library(Rnightly)


ui <- fluidPage(

  use_nightly(),

  h3("Click on the button below to toggle between a Purple/Light mode"),

  actionButton(inputId = "btn", label = "Button"),

  nightly(trigElement = "btn", bodyColor = "#6d6875", txtColor = "#fb5607")

)


server <- function(input, output){}


shinyApp(ui, server)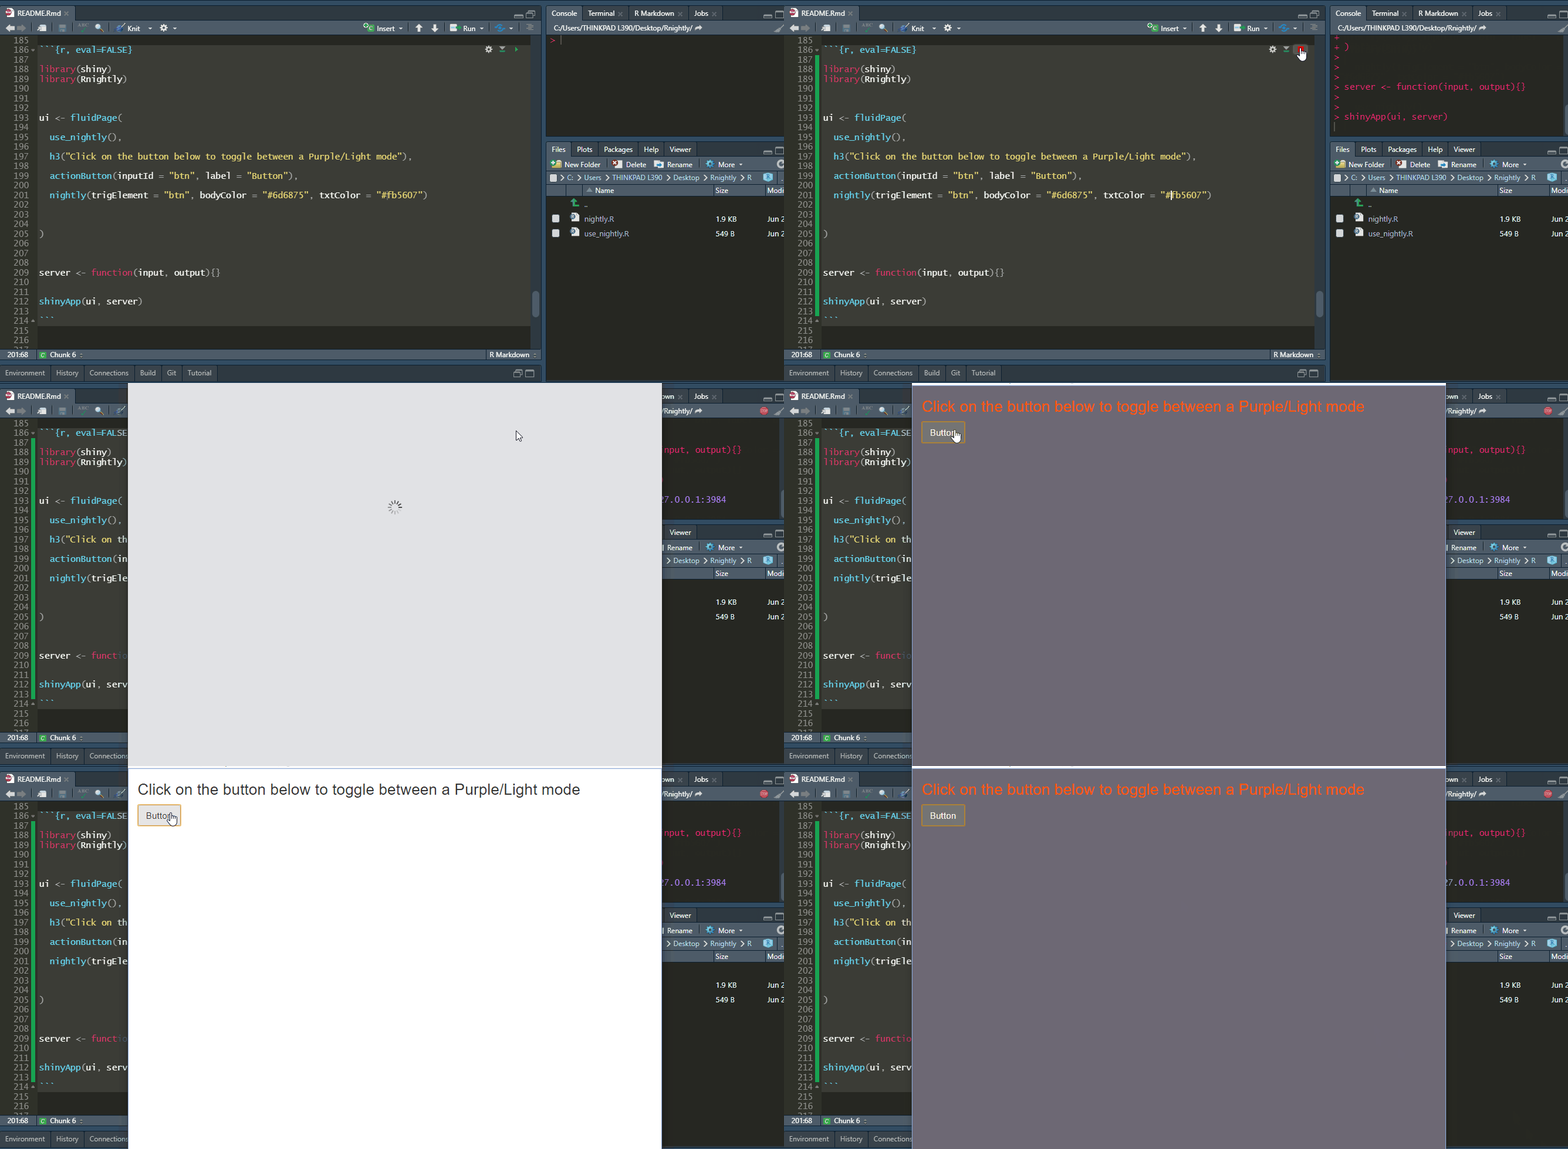
Further, you can set the text color within Shiny inputs that will be displayed after toggling :
library(shiny)
library(Rnightly)


ui <- fluidPage(

  use_nightly(),

  h3("Click on the button below to toggle between a Purple/Light mode"),

  actionButton(inputId = "btn", label = "Button"),

  br(), br(), br(),

  textInput(inputId = "txt1", label = "Type some text here"),

  nightly(trigElement = "btn",
          bodyColor = "#6d6875",
          txtColor = "#fb5607",
          inpTxtColor = "lightblue")

)


server <- function(input, output){}


shinyApp(ui, server)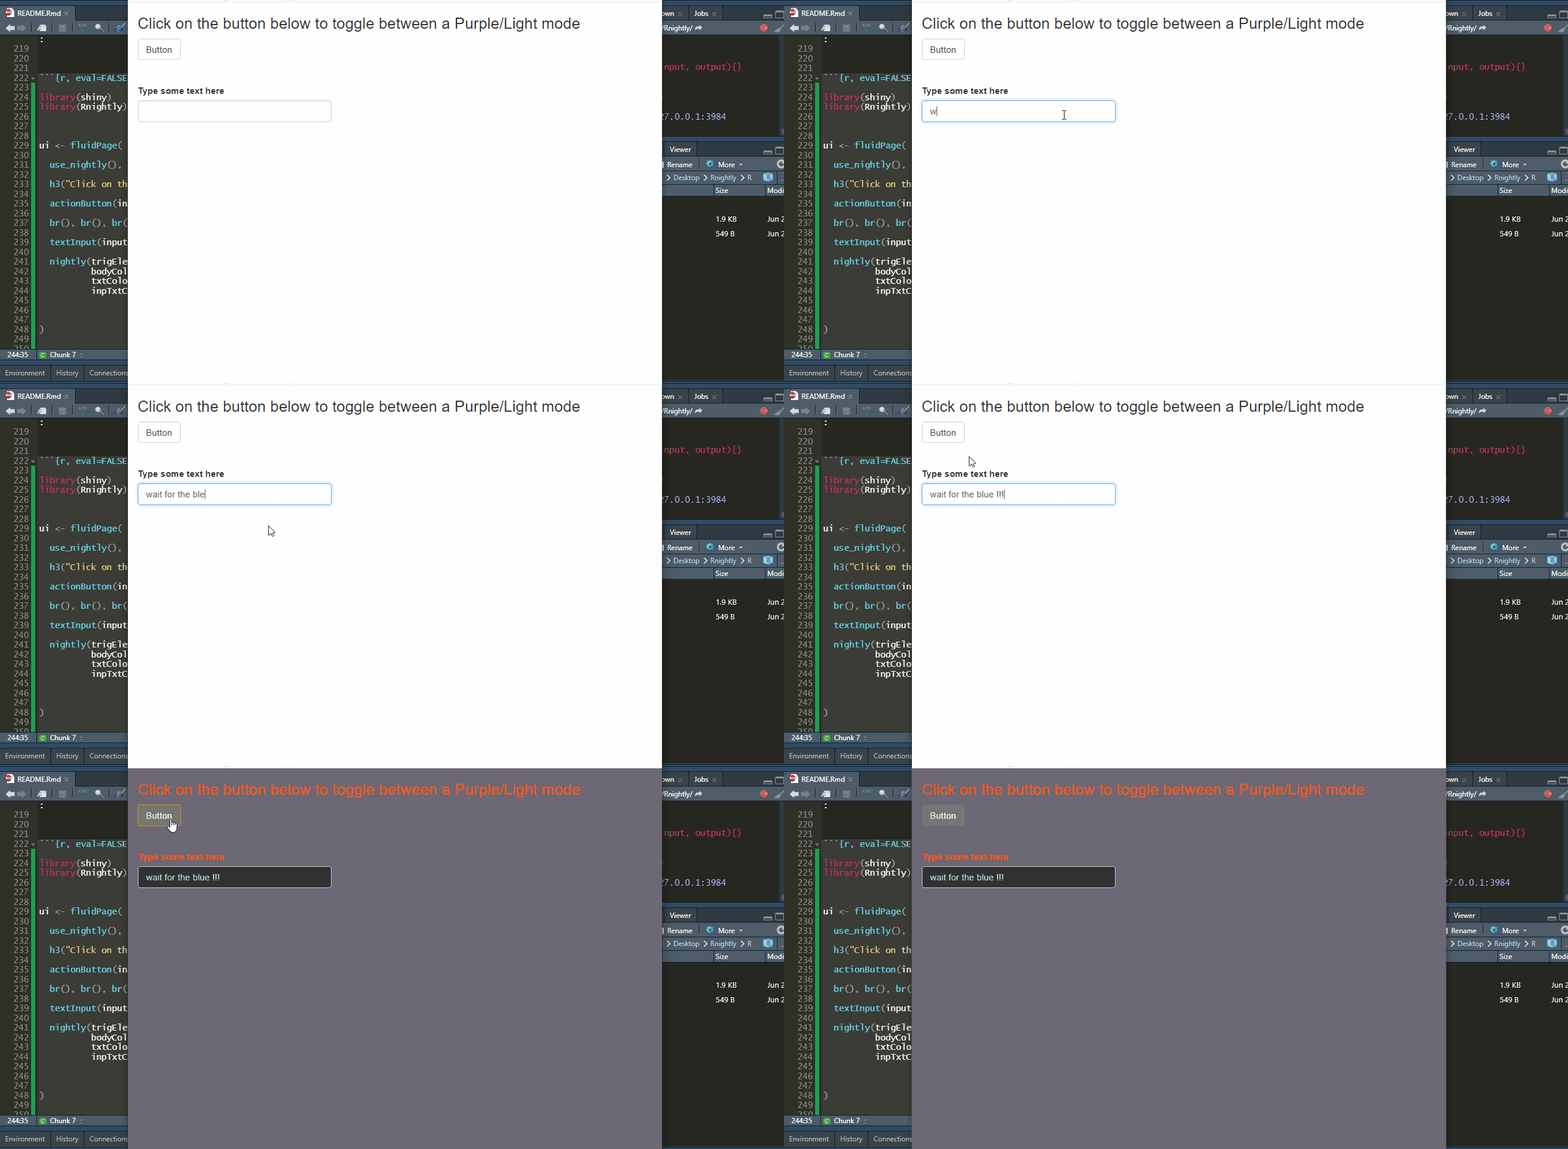
Finally, you can change the background color of Shiny inputs after toggling :
library(shiny)
library(Rnightly)


ui <- fluidPage(

  use_nightly(),

  h3("Click on the button below to toggle between a Purple/Light mode"),

  actionButton(inputId = "btn", label = "Button"),

  br(), br(), br(),

  textInput(inputId = "txt1", label = "Type some text here"),

  nightly(trigElement = "btn",
          bodyColor = "#6d6875",
          txtColor = "#fb5607",
          inpTxtColor = "lightblue",
          inpBgColor = "#f07167")

)


server <- function(input, output){}


shinyApp(ui, server)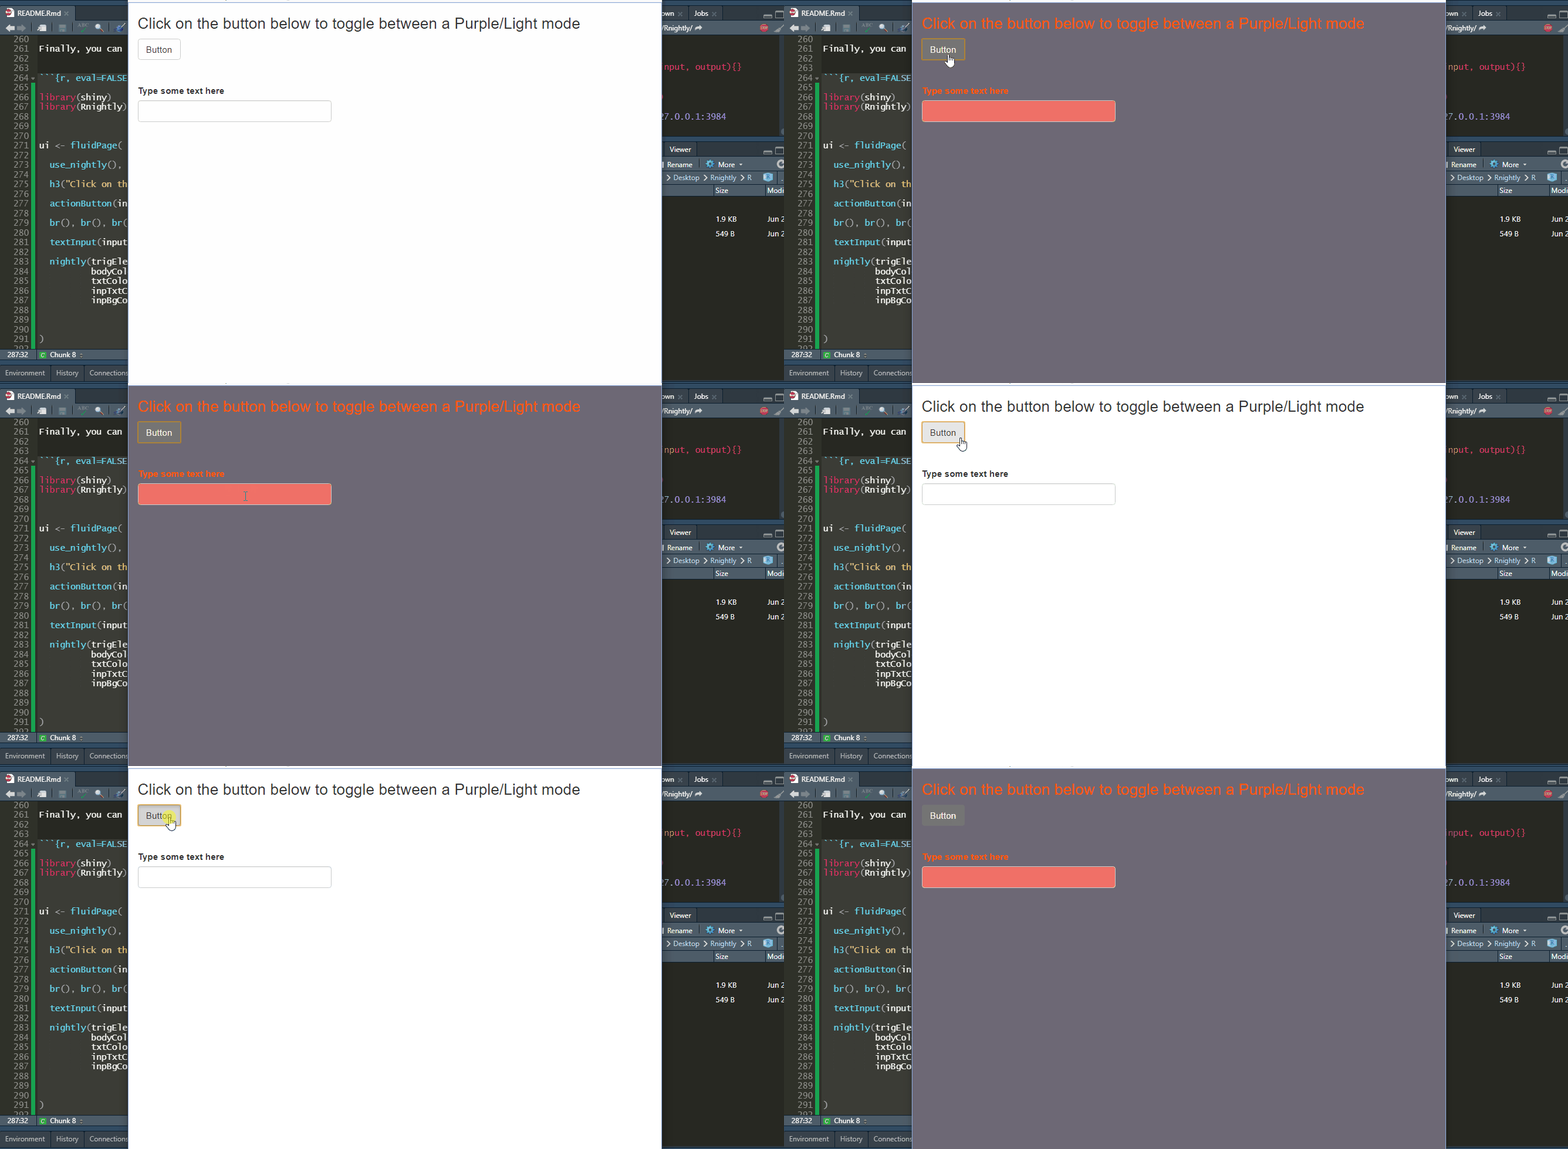
Please note that the Rnightly project is released with a Contributor Code of Conduct. By contributing to this project, you agree to abide by its terms.
These binaries (installable software) and packages are in development.
They may not be fully stable and should be used with caution. We make no claims about them.
Health stats visible at Monitor.